SeaRanchLodge.com is a participant in the Amazon Associate program and will earn from qualifying purchases.
Plumbing problems at home can be a living wreck. But as big as the problem may seem, the solutions are often quite easy. Loose kitchen faucets are one of these problems that hamper your regular clean-ups but has a really easy solution.
They may seem irritating, but with time, it starts to damage the pipelines too. So, you better get a move on fixing it before its too late. Loose faucets can be fixed pretty easily with some tools by yourself.
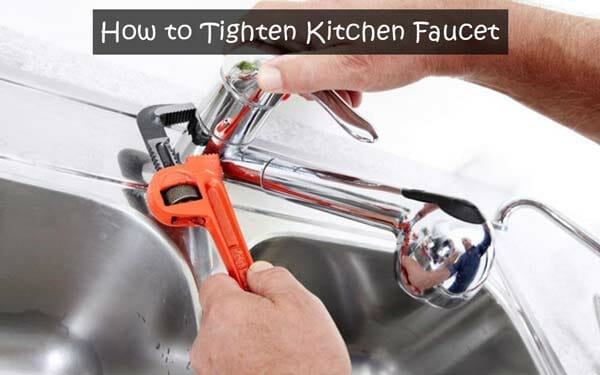
And also, it’s often bothersome to call plumbers for every tiny problem in the house. Here is a guide, in brief, describing how to tighten kitchen faucet. We hope next time you have a wobbly faucet, you will get to fix it yourself.
Causes of Loose Faucet
It’s pretty irksome working with a loose faucet with all the squeaky noises it makes. Overtime the handles and base may become loose due to overuse, but there are other causes like-
- Loose screws: The screws under the sink base that secure the faucet pipes may untwist and become loose over a long period of time.
- Loose faucet base: The faucet handles are attached at the center of the base. Due to excessive use, it may lead to loosening of the faucet base itself. It is most likely to result in leaks.
- Wearing out of the O-ring: The O-rings holds the faucet handles in place. As the handles are used frequently, this may result in loose O-rings.
Types of Faucets
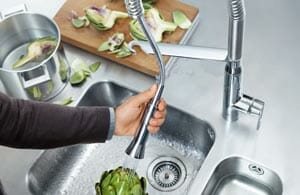
To enhance the beauty of your kitchen, various types of faucets have been invented over time. They are mostly designed to make your life less complicated. The types are-
- Pull out
- Pull down
- Single handle
- Dual handle
All these faucet designs make the job of tightening them different, too. We will discuss elaborately the faucets mentioned here and their ways of tightening them below.
How to Tighten Pull-Out and Pull-Down Faucets?
Here, we’ll detail the entire process in the easiest manner for you.
Required Tools
- Hex wrench
- Screwdriver
- New hose and sprayer
Pull-out and pull-down faucets create a lot of trouble, usually after a few months of its use. The sprayer and the hose are the core problem.
1. Fixing Leaky Hose Problem

When your faucet starts leaking, check the hose end first. Rather than replacing the whole faucet, you can just replace the hose.
➥ Turn off the Water Supply
Make sure you turn your water supply off before getting on your work. They are commonly located under the sink.
➥ Find the Connection of Hose with Water Source
Unscrew the hose from the water source and remove the weight or plastic connection below the sink. Now the screw can be either threaded or non-threaded. Work your way accordingly. You might need to lay back on a rug or pillow while working under the sink.
➥ Pull out the Hose
Gently pull out the hose from above the sink and replace it with a new one. Push down the new hose slowly.
➥ Reassemble Them
Put the weight back on and tighten the hose with the water supply. Turn on the water source to check any further leaks.
2. Fixing Leaky Sprayer Issue

Often the problem is in the sprayer with the pull-out faucets. It can be fixed in 4 easy steps.
➥ Turn off the Water Valve
You surely do not want to get drenched while fixing the faucets.
➥ Remove the Spray Head and Take out the Washer and C-Clip.
Spray heads are usually threaded and can be removed by bare hands in an anti-clockwise motion. Remove the washer and C-clip also to find out the main problem.
➥ Clean the Washer and C-Clip
Use a small toothbrush to clean the washer and C-clip thoroughly. Put them back in the right place.
➥ Replace the Spray Head
Take the old one to the store to match and buy a similar new spray head for your faucet.
How to Tighten Single Handle or Dual Handle Kitchen Faucets?

Before starting to work on the main job, you will need some tools and precautions to help you work on the faucets.
Tools Required
- Allen wrench or hex wrench
- Pipe wrench
- Rubber seals
- Old toothbrush
- Screwdriver
- New O-ring
- Heatproof Silicone Plumber’s Grease
Steps You Need to Follow
Here’s the guide you need to follow.
➥ Turn off the Water Supply
Turn off your water supply, which is from below the sink, or if there is no separate line for that, turn off the main water supply. The water shut-off line usually has a handle and a valve. Simply turn the handle clockwise to turn off the water supply.
➥ Remove the Handle Lever
The handle is usually attached to the faucet cartridge by screws from the sides, and the connection is covered discretely under a plastic cap. Remove the plastic cap and screws using an Allen wrench or screwdriver and pry off the handle gently.
➥ Remove Disc Cartridge
The ceramic disc cartridge is easily visible once the handle is removed. Use pliers to remove the cartridge and check for any leaks. It is better to replace the cartridge rather than repairing it.
➥ Clean and Reassemble Them
The rubber seals under the cartridge get mineral depositions and start leaking. Gently remove them and clean them with a toothbrush. If they are broken, buying a new set of rubber seals is always a better option.
If the O-ring of the faucet body is damaged, replace it too, or you can coat it with silicone grease for the time being. Reassemble them one by one and tighten the screws.
➥ Restore Water Supply
Turn on your water valve and check for any leaks. Make sure to tighten all the screws before turning on the water supply.
Conclusion
Your kitchen faucets are the most essential part of your kitchen. And you need them always while cooking or doing your chores. But if the faucets are leaky and wobbly, then they become bothersome.
Tightening the little screws or fixing the spray heads is all that it takes. Why bother a plumber for such a trivial thing. Next time we hope you read our on how to tighten kitchen faucet and try to fix them on your own. It will surely come in help to the users.
Recently Reviewed Accessories For Kitchen:


